Wednesday, October 28, 2009

We Now Return You to Our Regularly Schedule Blog

Alright, we are back in business here on my blog. In fact I have many pictures, although no recipes, for you today. Last week, my friend Heather asked if I could make some construction themed cupcakes for her son Kogan's 3rd birthday. I quickly made up a construction guy's face ala Bob the Builder. Heather thought it was cute, but Kogan, a boy who know what he wants and isn't afraid to ask for it, wanted a dump truck or digger on his cupcakes. So, this got me working on making something I had never done before. I saw a technique on a blog, Cake Journal, about making fondant plaques with a 2D image. So before I showed Heather what I would do, I did a test run, to make sure I could do it, and we had a winner. Below is the procedure to make the plaques. I used a marshmallow fondant, which I was going to include the recipe for, but I already had so many pictures to share with you, that I hope to share that with you next week, when I use it again for another cupcake order.


I should also mention that you will see more then just Dump Truck Cupcakes below. You see, Heather and Kogan share more then just the Mother/Son bond, they also share a birthday. So I made up some cupcakes, just for Heather, with pink and yellow fondant hearts. You can't forget Mom on her birthday.


Then along with these cupcakes, I included the cupcakes I made for the Halloween party Jeff and I went to this past weekend. Gotta say, the cupcakes costumes were better then ours. I'm really pleased with the way they turned out, and planned to do them for years to come.


Ok, enough of me blabbing on, here are this week's cupcakes.


After you have rolled out and cut the fondant into circles, place the image you want on the plaque. Then using a pin, pinprick the outline of the image into the fondant.
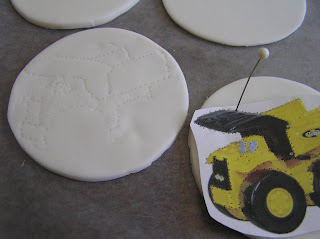


Here is a close-up of the outline that you have created.
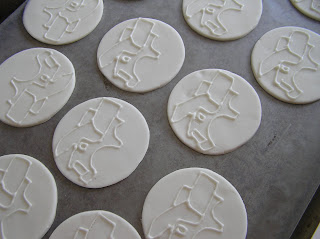

Using a very stiff royal icing, a pastry bag and a small round tip, trace the outline to make your design.


Now, with a thinner royal icing, fill in, or flood, your outlined image to make your design come alive.
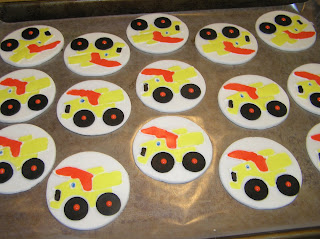


A whole fleet of dump trucks ready to roll onto the cupcakes. Let the plaques dry over night so that when you place them on the cupcakes, they hold their shape.


Then with a swirl of buttercream on your cupcake, your edible art work is ready for the party.


Here are the cupcakes I made up for Heather's birthday.


Fondant hearts with some royal icing.


These are the mini cupcakes I made for the Halloween party. If you have some frosting, some candy corns, a little fondant and time, these are easy and a big hit.
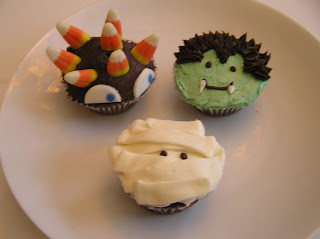


Monster, Dracula and the Mummy.

Tuesday, October 27, 2009

Technical Difficulties

I seem to be having some trouble getting the camera to download the pictures that I need for today's post. Which really sucks, because I am very excited about the cupcakes I was going to share today. I even had three different designs (well really five since the Halloween cupcakes I made for a party were three different ones) to show off, I mean share with you all today. My wonderful computer savvy husband is going to try and work on the problem in about an hour (he's in some meeting and won't drop everything right now - go figure lol). So hopefully later today I will be able to post my blog. If not today, then tomorrow.

Tuesday, October 20, 2009

In Honor and in Memory

Today is my Dad's birthday, so in honor of him I made my Mom-Mom's Jewish Apple Cake. You see Thursday is my Mom-Mom's birthday, and I wanted to make one of her recipes in memory of Mom-Mom. Dad sent me this one for Jewish Apple Cake, and I thought it was only fitting to make it for this week. My Mom-Mom was an amazing woman. She was loyal, hard working, honest and one heck of a baker. Mom-Mom had a legendary sweet tooth, and I believe she passed that on to everyone in the family. There were always something yummy to eat whenever we went to visit her. She is just one of the reasons I like to bake so much. So Mom-Mom, I hope I did you proud this week in making your recipe. They turned out quite good, if I do say so myself, and made a delicious breakfast for me this morning. (I'm planning on having some on Thursday too for her.)


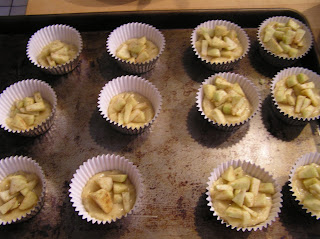
Preheat oven to 350. Now you are suppose to use a (greased) tube pan for this recipe, but believe it or not, I don't have one. So I made them as muffins. They came out very nice this way and took half as long to bake.


3 c flour
2 c sugar
1 tsp. salt
1 Tbsp. Baking powder


1 cup oil
4 eggs
¼ cup orange juice
2 ½ tsp. vanilla


4 chopped apples
2 tsp Cinnamon
5 Tbsp. sugar
1 tsp. nutmeg


This is a pretty simple recipe. Put all your dry ingredients together, mix all you wet ingredients together, and combine the chopped (and peeled) apple together with the sugar and spices.


Mix the wet ingredients with your dry ingredients. You will get a very thick and very sticky batter.


Pour half the batter into your pan. Add a layer of apples and then cover with more batter. Top with the remaining apples.


Bake for 1 1/2 hour. Yes believe me it will take that long to bake, and it will be so worth the wait. If you do make these as muffins (like I did), bake for about 30 minutes or until toothpick comes out clean (the good old reliable toothpick test).


You can serve this warm or cold, with powdered sugar sprinkled on top, or not. Just make sure you enjoy them.

Tuesday, October 13, 2009

Pretty in Pink

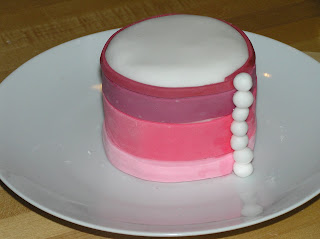
As you may or may not know, October is Breast Cancer Awareness Month. This is a disease that hits close to home for my family. Right before her 31st birthday, my sister was told she had breast cancer. So when I saw a post on Beantown Baker with a challenge, I had to do this in honor of Jodi. The challenge was simple, just make something pink. So I went a little crazy and made Pink Lemonade Cake (and cupcakes). I had never tried this recipe before, but after doing a little Internet surfing, and tweaking the recipe just a little, I had my pink cake (and cupcakes). You will see two different decorations in the post today. The first is the cake for the challenge which I decorated in different shades of pink fondant. And then the cupcakes that I decorated to look like mummies for a playdate that I am hosting today.


http://www.beantownbaker.com/2009/10/power-of-pink.html


This is the logo and link from The Beantown Baker's blog.


2 c flour

1 tsp. baking powder

1/2 tsp. baking soda

1 c sugar

1/2 c oil

4 egg whites

2/3 c frozen pink lemonade concentrate, thawed

1/4 c buttermilk

1/4 c heavy cream

zest from 1 lemon


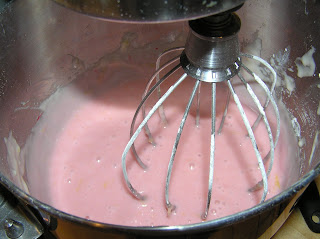
Preheat your oven to 350. In a bowl, mix together flour, baking powder and baking soda, set aside. Also, combine the buttermilk and heavy cream to use later. In another mixing bowl, combine sugar, oil, whites, lemonade and zest. Alternatively add flour mix and buttermilk/heavy cream to sugar mixture. You may or may not want to add some pink food coloring, I did.


Pour into greased pans or cupcake papers and bake for 20 minutes or until toothpick comes out clean.


Decorating the cake with different stripes of pink fondant.


Some fondant pearls just to dress it up a bit (and hide the seam).


The Breast Cancer ribbon. (sorry for the blurry picture)


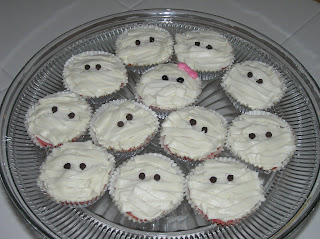
Little mummies ready for the kiddos.

To make these I just frosted the cupcakes with some white frosting and then used the backside of a basket weave tip to create the bandages. Leave a open space for the eyes and then place 2 chocolate chips (upside down) so your mummy has a face. So cute and so easy.

Tuesday, October 6, 2009

Pepperidge Farm...eat your heart out.

Ok, I admit, they are not quacking in their boots or eating their hearts out over at Pepperidge Farm, and I don't really think they need to either. For this week's blog, I tried my hand at making Milano ( or Milan) cookies, the best cookie that Pepperidge Farms makes. I love these cookies (especially the double chocolate ones), and could eat a bag in one sitting. A while ago, my friend and follow blogger Beth made a version of the Milan for a Daring Bakers challenge. She made her's with coffee and Nutella, and I, not liking coffee or having any Nutella in house, made mine plain with as much chocolate as I could sandwich in between the two cookies. These are pretty easy to make, just a little time consuming. They were very yummy, although not as crisp as Milanos generally are. (I think I added a little too much egg white) I will say after two days, there were none left in the house, so they were definitely a hit. The following recipe is the version Beth was given for the challenge, changed a bit by me. If you would like to Beth's coffee/Nutella recipe, go to

http://cookiepiebklyn.blogspot.com/, and you find that recipe and so many more.


Preheat your oven to 350.


12 Tbsp. unsalted butter, softened

2 1/2 cups confectioners' sugar

7/8 cup egg whites (from about 6 large eggs)

2 Tbsp. vanilla extract2

Tbsp. lemon extract [I omitted]

1 1/2 cups all-purpose flour


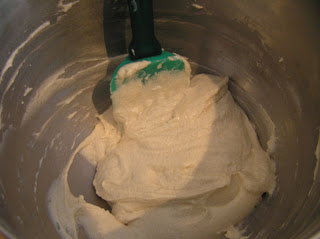
In a mixing bowl, using an electric mixer, cream the butter with a paddle attachment, then mix in the sugar. Add the egg whites gradually and then mix in the vanilla extract. Add the flour until just incorporated.


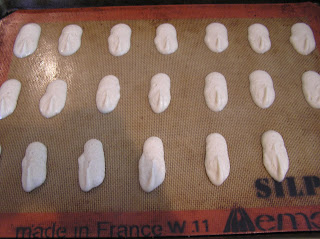
With a small (1/4-inch) plain tip, pipe 1-inch sections of batter onto a baking sheet, spacing them 2 inches apart. Although I will admit, I did not have a tip, so I just used the bag.


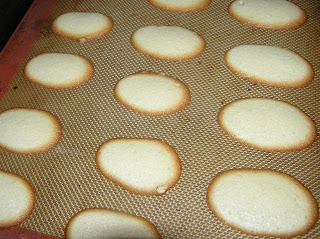
Bake for 10 to 12 minutes, or until light golden brown around the edges. Let cool on the pan.


1/2 cup heavy cream

8 oz. semisweet chocolate


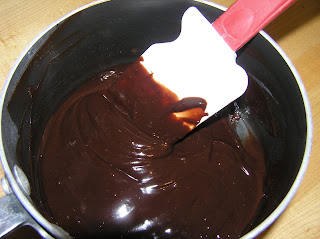
In a small saucepan over medium flame, scald cream. Pour hot cream over chocolate in a bowl. Whisk to melt chocolate and blend well. Set aside to cool. The ganache will thicken as it cools. Now pair up the cookies to match as best as possible. Spread with cooled ganache and sandwich together.


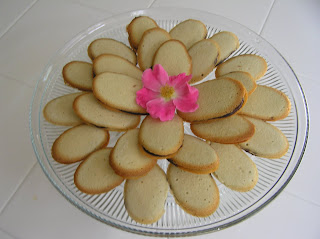
The finished product!


Delicious!