Monday, June 27, 2011

Play Ball!

I love baseball. Have since I was 8 years old. I am a die hard Phillies fan, although I do cheer on the Brewers (as long as they aren't playing the Phillies) now that I live here in Wisconsin. So when my friend Drina asked for some baseball cake pops for her son's last t-ball game, I thought what fun. Then I started making them. Now I'm not saying I didn't enjoy making them, but they were a bigger challenge for me then I thought they were going to be. In the end, I was glad I got to make them and they turned out really cute.


Play ball!

Tuesday, June 21, 2011

Old Glory...in Cupcake Form.

My oldest Samantha has been asking to bake something lately, so I decided to takes the opportunity to make some colorful cupcakes. I have never really liked making red velvet cake because it requires so much red food coloring. But since July 4th seems right around the corner, I thought I would have fun and play with a red velvet recipe to make some patriotic desserts.

So the recipe I used for my cupcakes was really easy. I found it on the Just a Pinch Recipe Club website. Here is the recipe as it appears on the site.

Red Velvet Cake

1/2 c crisco
1 1/2 c sugar
2 oz red cake coloring ( 4 bottles)
2 egg
1 tsp soda
1 Tbsp cocoa powder
1 tsp salt
1 c buttermilk
2 1/4 c cake flour sifted
1 tsp vanilla extract
1 Tbsp vingar

Cream shortening , sugar and egg. Make paste of the coloring and the cocoa and add to the mixture. Add flour, salt, milk and vanilla, beating with mixer. By hand fold in vinegar and soda. Bake in 3-8" pans- bake at 350 for 30 min. let cool before icing.

Now I generally don't bake with shortening, but I have nothing against it. I just grew up using butter and margarine. Thankfully I had some Crisco on hand, so I used it. I also creamed the shortening and sugar by itself first, then added the egg. At first I didn't add the cocoa because I wanted to keep my batter white. I divided the cocoa amount into thirds, and that when I added the colors.
So here are my three batters. After I divided the batter into three parts, I add the cocoa to the bowls for the blue and red layers. I did not use the amount of color the recipe called for, I kind of eyed my amount. I used AmeriColor Super Red and Navy Blue gel colors to get my shades.
I started layering the batters by putting about 2 ounces using a scoop...blue first.
Then the white...
And topped it off with the red cake batter.
I was really please with the tops on theses cupcakes and I loved how the colors stayed true during baking.
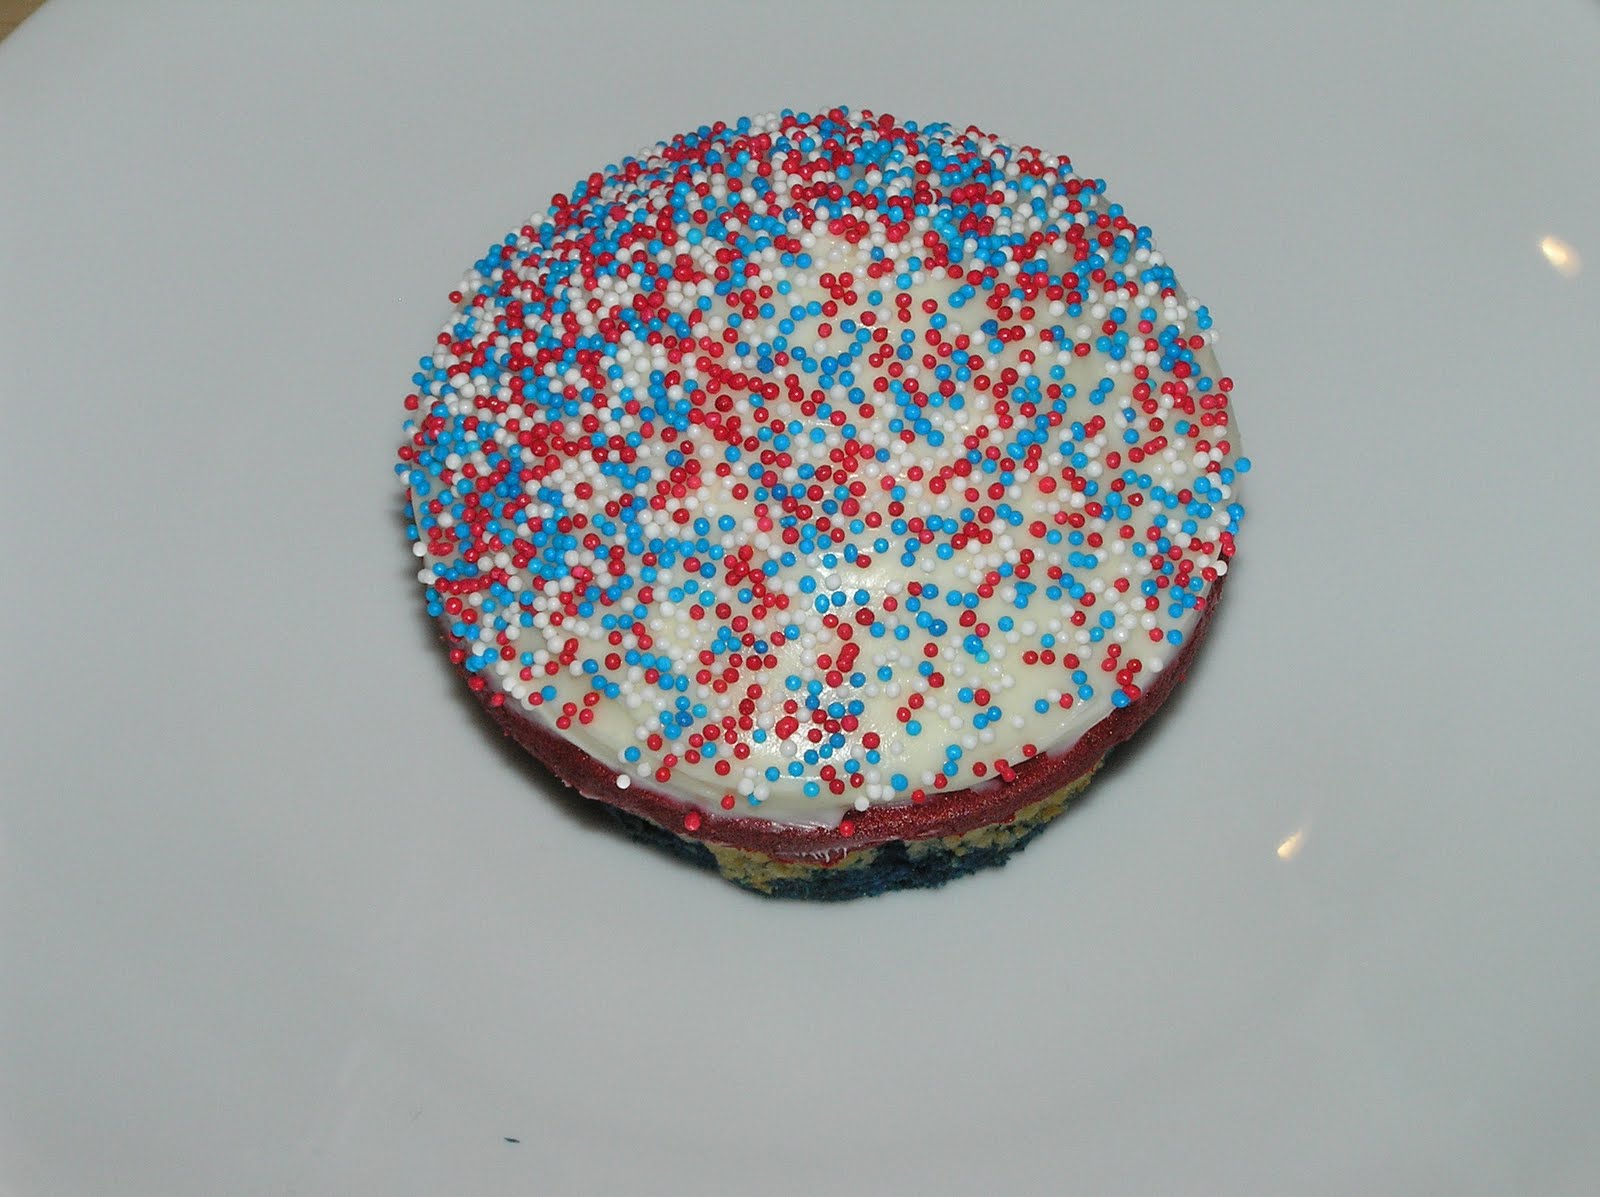
Topped with some cream cheese icing and red, white and blue sprinkles, the cupcake is complete.
Loving the layers and ready to make them again for the 4th!

Tuesday, June 14, 2011

Building a Cake

Back in May, I was asked to make a LEGO cake. Actually first it was to be an ice cream LEGO cake, but then it was changed to a chocolate cake (the best kind next to ice cream) that looked like a LEGO. As a kid, I used to love LEGOS. I had hundreds of them and was always building something from them. So this cake brought back all the memories of my childhood LEGOS. My friend Tami pretty much gave me freedom to make this look how ever I wanted. She just asked for a basic LEGO color. I went with yellow because I figured it would create fewer colorfull tongues and less stains should it drop on any clothing. I used small red and blue fondant LEGOS to add a little more color and interest to the cake. The knobs on top of the cake were made out of cake pop mix, so getting one of those pieces was extra special.
Sadly, I was kind of out of it the week I made this, so this is the only picture I took of the cake.

Tuesday, June 7, 2011

3,2,1...Blast Off!

My little boy turns three today. It seems so hard to believe that he is three already, but I must face the fact that he is. (sniff, sniff).
This weekend we celebrated Riley's birthday along with his good friend Noah's. The boys were born 4 days apart. Noah's Mom, my good friend Cecilia, and myself worked together to make sure the boys had an out of this world birthday celebration. We went with a space theme. Cecilia made these incredible and adorable invitations. I should have a picture here, but sadly I don't. She also made great food labels for all the food we made for the party.
We had Gravity Grub and Extraterrestrial Munchies.


We also served Cosmic Fruit Salad, PB & J Stars and Moon Sammies and Moon Rock Meatballs.
There were also Asteroid Dogs and Solar Flair Brats (I just don't have a picture of them). There were 3 Refueling Stations along with Rocket Fuel for the kiddos. This one just happened to be my favorite.


For dessert, we had star cake pops. These guys were a big hit and went very fast.

I had a lot of fun making the boys' cake. I got to use wires (for the first time) and metallic disco dust. Of course the cake was all chocolate, because according to Riley "Chocolate gives me power".

The boys seem to be very happy with their cake.


And enjoyed eating their very own special mini cakes complete with a martian popping out of it.

Tuesday, May 24, 2011

May Flowers

My middle child Mackenzie recently graduated from preschool. So I needed a gift for her teachers.

This is what I had to work with. What to make, what to make...

Oh yeah, I had some cake pops too. Mackenzie's teachers fell in love with the cake pops last year when they had my oldest daughter Samantha. They were pretty happy to find out they had Mackenzie this school year so they would still have a chance to have cake pops. (they are also happy that they get next year too with my son) So, with some white chocolate covered cake pops that I sprinkled some pink sugar on, I decided to make the teachers little bouquets of flowers. I cut a slit into the circle to about the middle and then punched a hole. I wrapped the circle around the cake pops and tapped it together and on to the stick.

After that I made eight small triangle cuts to create the pedals. I then rounded the edges to make them look even more like flowers.

I did three fun bright colors (we have had a ton of rain as of late and need any color we can get around here).


I bundled them up and tied some pretty ribbon to finish it off. Mackenzie was happy with the outcome and so were her teachers.

Saturday, May 14, 2011

So Much in Love

One of my husband's cousins is getting married this summer, and this past weekend was her bridal shower. I was asked if I could make favors that could double as place cards for the party. So I got to thinking what cookie cutter did I have that is approriate for a wedding and big enough to write a name on...

My answer was a wedding cake. After baking and icing the cookies, I piped a white border around the edge. Now I probably could have piped the border first and then do the flooding technique to cover the cookie, but I wanted to make sure that the border was raised higher than the icing. I really wanted it to stand out since it was the same color.


Next I colored some of the royal icing a pistachio green and piped some scroll work in the corner. I love scroll work, don't know why, just do.


Then I used a dab of royal icing to glue a royal icing flower to the cookie. I had all different color flowers to add more interest to the cookies.


Once I had the corners decorated, I wrote a name on each cookie and let the icing dry for 24 hours before I put them in bags and tied them up with pretty ribbons to finish the favors.


Congratulations Erica and Tim! May you have a wonderful life together!

Tuesday, May 10, 2011

The Blue Bird of Happiness

A month ago, I made some cakepops that looked like birds. I had seen some brownie pops dressed up as birds and wanted to do pretty much the same thing for my bunco buffet and for little favors for a playdate I was having for my oldest daughter and a bunch of her school friends.

I started by shaping the cake pop more like a strawberry then a ball. Then dipped it in blue candy melts (and a few got covered in yellow as you will see below). After they were all set, I mixed up a batch of handy dandy marshmallow fondant, coloring some a periwinkle blue and some orange.

I took little balls of the orange fondant and shaped them into little triangles. Then I used water to glue them onto the front. I used a food color marker to create the eyes of my sweet little birds.


I cut tear shaped pieces for the wings. To make them a bit more realistic, I curved the tips of the wings. I used water once again as glue, to put the wings on the side of the bird.


And there you have it, my blue (and yellow) birds of happiness.