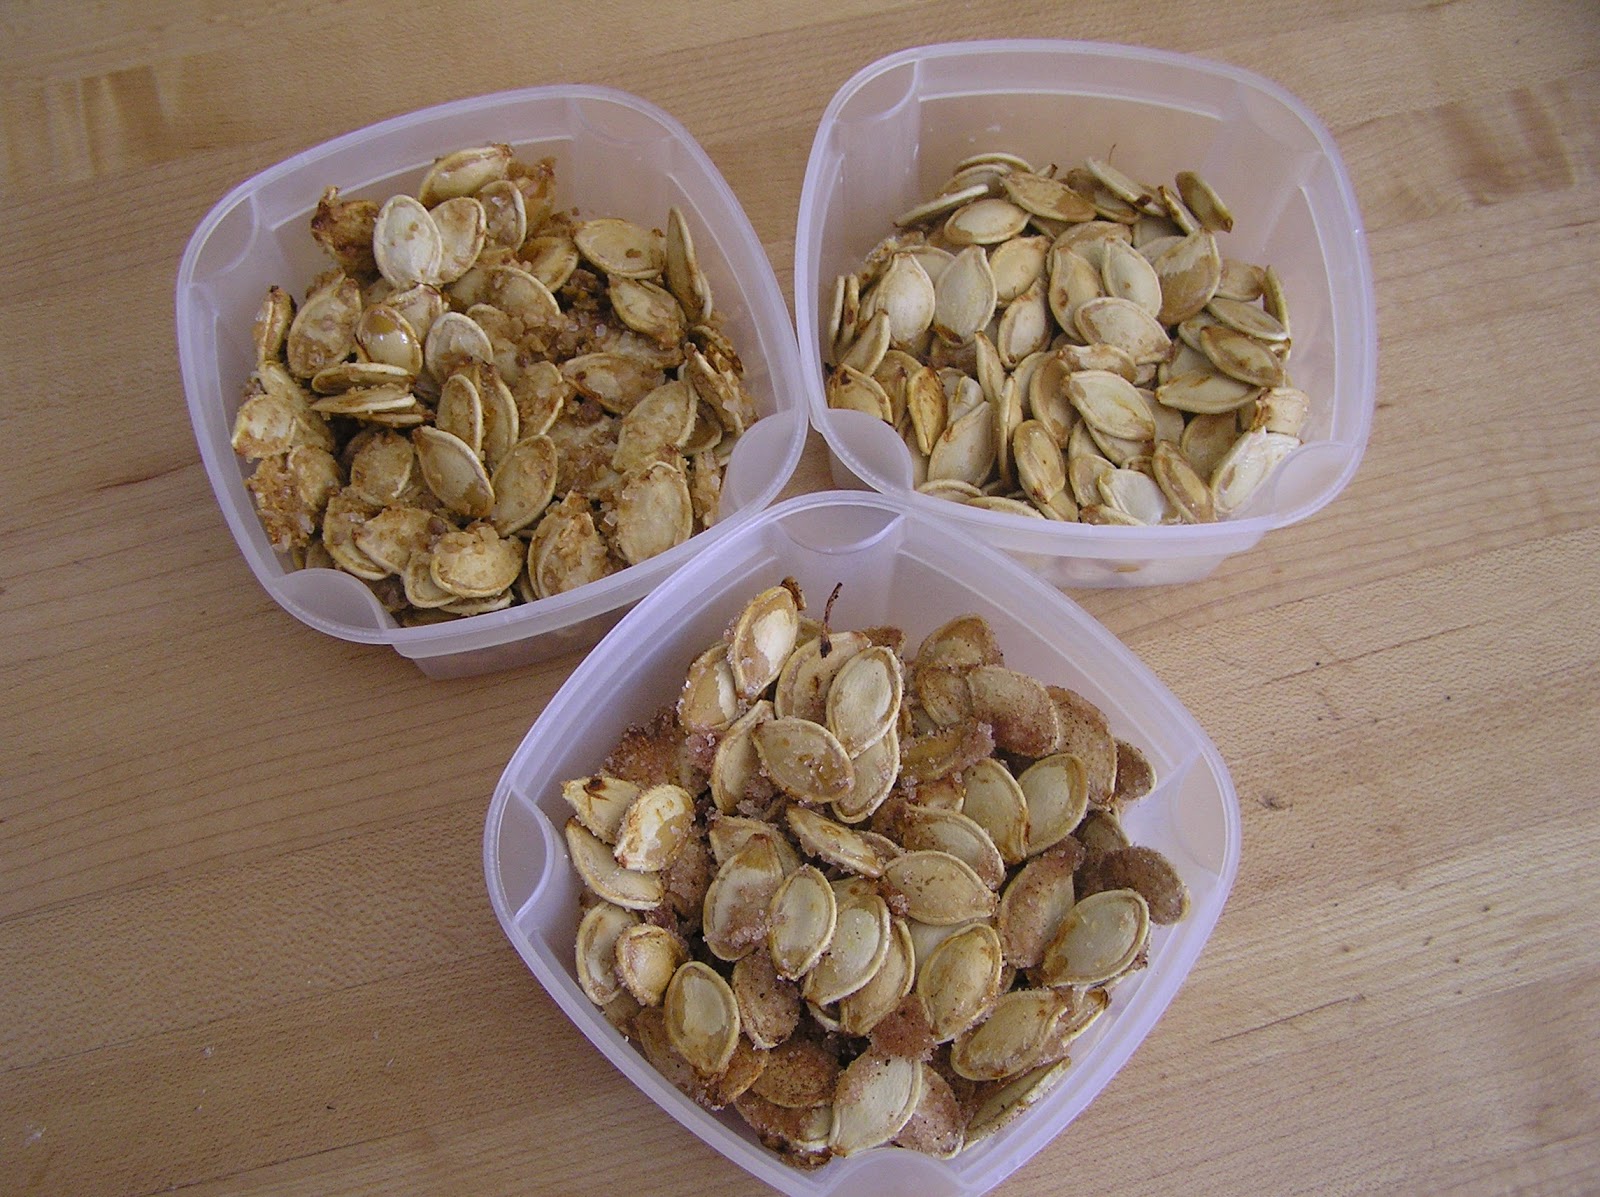
With the craving of our pumpkin this year, I decided to roast the seeds for a yummy snack. This is something I used to do all the time as a kid, but hadn't done for my family yet. And because I live with a bunch of picky eaters, I thought it might be fun to try some different flavors on our pumpkin seeds, in hopes they might try them.
The recipe itself is super easy. Separate the seeds from the membrane. The website I was following suggested soaking the inside of your pumpkin in cold water to help the seeds free themselves from the goop. Well, they didn't just unattach themselves magically, but it was pretty easy to separate the seeds once they had soaked. I placed my seeds on a paper towel and let them dry overnight. Now for the roasting part...preheat the oven to 350. Once the dried, toss the seeds in 1-2 tablespoons of olive oil. Lay the seeds in a single layer on a sheet pan. Here is where you get to have fun. The three flavors I chose were cinnamon sugar, traditional salt and a caramel crunch mix from Pampered Chef. You could really do anything sweet or savory. Place in oven for 15 minutes and then you are done.
I think my favorite are the caramel crunch, although I have to say all are really tasty. Hope everyone has a Happy Halloween!
Tuesday, October 30, 2012
Tuesday, October 23, 2012
Can you hear me now
This past weekend, was our neighbor's birthday. His wife Melissa asked if I would be able to make a cake for him, and of course I said yes. Now Mike is very into his cell phone. Loves the little device. And because of that, a cell phone cake was a must. Melissa and I were very sneaky and I was able to take pictures of Mike's phone on my phone to help me recreate it. The cake was chocolate with a chocolate fudge filling, covered in vanilla buttercream and good old marshmallow fondant.
Melissa texted me later that the cake was a big hit and that Mike loved it.
When I first saw Mike's phone I really liked the dandelion on the screen, and I'm pretty pleased at how that came out here. I hand painted it on just using some white and black food coloring.
Melissa texted me later that the cake was a big hit and that Mike loved it.
When I first saw Mike's phone I really liked the dandelion on the screen, and I'm pretty pleased at how that came out here. I hand painted it on just using some white and black food coloring.
Tuesday, October 16, 2012
Hooters
This past week, I made a birthday cake for a friend of ours who was turning 40. 10 years ago when she was turning 30, my husband and some of their other coworkers took her out to lunch to celebrate her birthday. The one thing is they told her they were taking her to one restaurant and ended up taking her to Hooters. So, because of this legacy, the party organizers (her husband and one of her old coworker) wanted to have a cake with a Hooters feel to it. And they were hoping for a 3D effect on the cake. I needed to make a cake that would feed 70-75 people and had boobs on it, not a challenge you get every day (at least I don't) To make the cake big enough I made 4 14" cakes, 2 vanilla and 2 chocolate. The coordinating layers went together and then the vanilla was placed next to the chocolate on a big old cake board. To create her chest, I basically made cake pops and formed them to the shape I needed. And to make her face, I simply used buttercream and a whole lot of cursing. The end result is below...
Sorry for the fuzzy picture, it was after 11:30 when I was able to finish this cake and I have to admit, I was a little fried.
Monday, October 8, 2012
I do
What happens when you take over 2000 hand rolled fondant pearls,
a bunch of hand made fondant flowers and combine it with different flavors of buttercream, and three kinds of cake...
You get Emily and Steven Seiltz's wedding gift.
This past weekend, I had the pleasure to create this wedding cake for the wonderful couple. It took about two weeks of prep time, many, many, many eggs and a couple of curse words to pull the cake together.
The cake stood just over 2 feet tall and the pearls had to be put on to the cake one at a time with a pair of tweezers. The layers were white cake with almond buttercream and raspberry filling, chocolate with chocolate fudge filling, spice cake with caramel buttercream, chocolate with coffee and caramel almond buttercreams, and the final layer, for the couple on the first anniversary, was white cake with chocolate fudge filling. I got many compliments that night, the best one coming from the bride when she told me it was even better than she imagined. Congratulations Emily and Steven! :)
a bunch of hand made fondant flowers and combine it with different flavors of buttercream, and three kinds of cake...
You get Emily and Steven Seiltz's wedding gift.
This past weekend, I had the pleasure to create this wedding cake for the wonderful couple. It took about two weeks of prep time, many, many, many eggs and a couple of curse words to pull the cake together.
The cake stood just over 2 feet tall and the pearls had to be put on to the cake one at a time with a pair of tweezers. The layers were white cake with almond buttercream and raspberry filling, chocolate with chocolate fudge filling, spice cake with caramel buttercream, chocolate with coffee and caramel almond buttercreams, and the final layer, for the couple on the first anniversary, was white cake with chocolate fudge filling. I got many compliments that night, the best one coming from the bride when she told me it was even better than she imagined. Congratulations Emily and Steven! :)
Wednesday, September 19, 2012
It's a mad,mad world
Hold on to your hats folks, this is going to be a long post. I say that because I actually remembered to take pictures as I constructed the cake. Yes, thank you, I was proud of myself too. The cake I am showing you today was for my daughter Samantha's birthday party, and it was my first ever tospy turvy cake, aka a Madhatter cake. I have been wanting to make one of these for a while, but never had a reason, or found a photo tutorial online (many video ones, but I wanted pictures) that I felt comfortable with explaining it to me. Well, I finally found one, did what they said, and I'm happy to report it worked! Now I have basically recreated the tutorial for you here so you too can try to make your own tospy turvy cake. (it's easier than you might think)
First you will need at least three layers of cake for each tier. I myself used four. Slice one layer on an angle like pictured above.
Now flip the one piece upside down onto the other piece.
Layer your cake like you normally would, making your angled layer the top.
Do a crumb coating (or a thin layer of frosting) on your cake. Refrigerate to set the buttercream.
Cut a piece of wax paper in a circle the same size as your next tier. Place it on the cake and cut out the shape with a sharp knife.
Score the circle into four sections to make it easier to remove the cake.
Now simply remove the sections, creating a crater for the next tier to sit in.
Frost your cake again, then refrigerate it to prepare for your fondant.
Cover your tier in fondant, making sure to smooth the fondant into the crater. Also, as for all tiered cakes, you need to place dowels or cut straws to help support the weight. Follow these steps for all you tiers, except of course your top layer. When placing the next tier on, put a little buttercream in the crater to help adhere the cake. Also you will want to put the slant of the next tier the opposite direction as the layer below it.
Follow the steps above, decorate as you see fit, and you will have a final product like what you see above. This year, my daughter had a rollerskating party and our theme was Rock and Rollerskating.
Samantha informed me that the cake needed a pair of roller skates on it because of the theme. So here's my cake topper.
I hand cut a guitar and peace signs, and used cookie cutters for my stars, flowers and heart with wings. All these items were on the napkins and plates we had for the party, so it was only fitting they make it on the cake.
I originally wanted to have swirls airbrushed on the fondant like a background for the other decorations. Sadly, I do not own a airbrush (yet) and the can of spray food coloring didn't give me enough control or a fine enough line to get the look I wanted. Instead I used a stencil and some pearl disco dust to create a background of stars.
First you will need at least three layers of cake for each tier. I myself used four. Slice one layer on an angle like pictured above.
Now flip the one piece upside down onto the other piece.
Layer your cake like you normally would, making your angled layer the top.
Do a crumb coating (or a thin layer of frosting) on your cake. Refrigerate to set the buttercream.
Cut a piece of wax paper in a circle the same size as your next tier. Place it on the cake and cut out the shape with a sharp knife.
Score the circle into four sections to make it easier to remove the cake.
Now simply remove the sections, creating a crater for the next tier to sit in.
Frost your cake again, then refrigerate it to prepare for your fondant.
Cover your tier in fondant, making sure to smooth the fondant into the crater. Also, as for all tiered cakes, you need to place dowels or cut straws to help support the weight. Follow these steps for all you tiers, except of course your top layer. When placing the next tier on, put a little buttercream in the crater to help adhere the cake. Also you will want to put the slant of the next tier the opposite direction as the layer below it.
Follow the steps above, decorate as you see fit, and you will have a final product like what you see above. This year, my daughter had a rollerskating party and our theme was Rock and Rollerskating.
Samantha informed me that the cake needed a pair of roller skates on it because of the theme. So here's my cake topper.
I hand cut a guitar and peace signs, and used cookie cutters for my stars, flowers and heart with wings. All these items were on the napkins and plates we had for the party, so it was only fitting they make it on the cake.
I originally wanted to have swirls airbrushed on the fondant like a background for the other decorations. Sadly, I do not own a airbrush (yet) and the can of spray food coloring didn't give me enough control or a fine enough line to get the look I wanted. Instead I used a stencil and some pearl disco dust to create a background of stars.
Wednesday, September 12, 2012
Grab your Purse
The begining of this September gave me an oppurtunity to have fun, and experiment with decorating a cake. September 2nd is the birthday of our neighbor across the street. Since we have become very good friends, I sent a text to her husband to see if it would be ok for me to make something for her. He enthusiastically said yes, and a cake was born.
I have been wanting to make a purse cake, so I thought this would be the perfect chance to try. Looked at a couple of pictures and then came up with the pink purse in the middle of this photo.
And what's a purse without a string of pearls? The pearl earrings were my daughter Samantha's idea. I like how they added to the whole appearence.
To let the birthday girl know the cake was her's, a golden key with a monogram key ring. She loved it all, and told me it took her a while before she could actually cut into it to eat the cake.
Wednesday, September 5, 2012
Lala lala, lala lala...
Elmo's world
:)
Come on sing sing along. Lala lala, lala lala...
Yep, that's a cake pop I made for my friend's little girl's second birthday party. To get the fur effect, I dipped the pop in red candy melts, placed the eyes, nose and mouth, which I had made out of fondant. After that was dried in place, I took a toothpick and added more melted candy melt to the cake pop, and viola, Elmo has fur.
Subscribe to:
Posts (Atom)