Wednesday, December 29, 2010

Hut Hut Hike

A couple of weeks ago, I had the pleasure of making a football themed cake for a little cutie turning one. His mom Stephanie asked for a marble cake with raspberry filling and a smash cake for Greyson. They had decided to go with a football theme, and living here in Green Bay, I naturally made the colors green and gold.


So I started with some green vanilla buttercream to make the field.
And made the side of the cake look like a football field.

For Greyson's smash cake I made his very own #1 jersey out of marshmallow fondant. I used green disco dust to color the 1 and add the stripes.

The football was made by stamping the design on to a piece of fondant.
Touchdown!

Tuesday, December 21, 2010

So Which One Are You?

Last week, I shared some snowman cookie pops that I had made for my bunco night.

Remember these?

I had planned to make them again after my husband volunteered to bring dessert to his work party. But when I went to dipped them last night, I realized I did not have enough white chocolate to make 2 dozen of them. So, I started thinking up other ideas. Now mind you, December has been an extra crazy month for me with cookie orders, cake orders and then the everyday crazies that any household has, and my brain was kind of fried at this point.
Then like a lightening bolt, it struck me! I knew how to decorate these tasty looking dark chocolate dipped cookie pops. I decided they needed to ask the age old holiday question.
Well, which one are you? Would Santa bring you this treat?

These are pretty easy treats to make. Sorry I have no pictures of assembling them, I always think about it right after I finish up the last one. I figured I could walk you through it with no pictures, so here goes. First you separate your Oreos into two halves. Then dip the lolli pop stick in some melted chocolate. Place it in the cream section of the cookie and then put the second half of the cookie back on top. Let set...yep pretty much that simple. After they are together, cover in melted chocolate just like you would a cake pop, standing them in a piece of sytrofoam so they dry with no flat bottoms. To make the cookie pops above, I took some melted white chocolate and wrote nice. I let the chocolate completely dry so I would be able to put it face down.

Next, I took a reddish pink chocolate I had leftover from another project to write the word naughty on the other side of the cookie pop.

For display, I took a small box, covered it in one of those leftover pieces of wrapping paper you always have from wrapping gifts, you know the ones I mean. I put in a piece of sytrofoam and ended up with this display.
I just want to end by saying I hope everyone has a very Merry Christmas and a Happy New Year. Thanks so much for reading my little blog here. :)

Wednesday, December 15, 2010

Bunco!!!!

Last April I started playing Bunco with great group of ladies. We take turns each month hosting Bunco night. I got to host the wonderful month of December. Now at first you might ask, are you crazy to host with a month that is so busy with holiday preparations, and the answer to that is yes, yes I am. But then again, after 10 years in the service industry, a crazy December is kind of like second nature to me. Now, when hosting, you always want to make sure you have a great variety of treats and drinks for the other ladies to get the night started off right.

I set up a little cocoa bar to help warm everyone up. I had regular hot chocolate and a white chocolate cocoa, along with chocolate dipped peppermint stirrers and Peppermint Schnapps for those who wanted their cocoa with a little extra something.
I made Cranberry Barbeque Meatballs and a yummy Cherry Butter Braid (sold by my daughter's school at fundraising time).

I also had some sugar snowflake cookies, Peanut Butter Blossoms (my favorite) and Orange Cherry Tea Cookies.

For dips and spreads I made a Cranberry, Caramelized Onion and Goat Cheese Spread (you can kind of see it in the picture there on the left) A warm Artichoke and Spinach dip, Amaretto dip and fresh made Salsa (thanks to my Mother in law). For my friends dipping pleasure I had Snowflake Ritz, Apple Slices and Tostitos.

Here's a closer look at my cookie selection.

And of course, it wouldn't be one of my parties without cake pops. Accompanying the cake pops are Mint Oreo Cookie Pops. This was my first time ever making them. They were pretty easy and I ended up hand painting on the faces with food coloring because my food coloring markers weren't working on the white chocolate.

Wednesday, December 1, 2010

Hot Wheels

My lastest cake was for my friend Drina's adorable son Emery. Emery was turning one and Drina asked for a cake and a smash cake for his party. She had no colors in mind and no theme that she was using. She told me that Emery liked anything with wheels...so a car cake it was.

I have a couple of sets of cookie cutters that have matching stamps. So I cut a car, a pick-up truck and a fire engine out of marshmellow fondant and stamped them with bright colors. I also cut out some stars and stamped then to go on the cake. This was the first time I have tried something like this, and I'm really happy it worked.
I then arranged the cutouts on the side of the cake.

Finished off with a top and bottom border of small shells, and a happy birthday to Emery, and his main cake was done.

For his smash cake, I thought it would be fun to make the side look like a racing flag. I achieve this look by cutting little squares of black fondant and placing them on the cake. I then made a little car out of some fondant to top of the smash cake. After looking at the cake, my youngest, Riley, said cute race car, so that gave me the idea to add the red one on the side of the car.

The complete set. Vroom, vroom!

Wednesday, November 24, 2010

Pumped for Pie

Since tomorrow is Thanksgiving, I decided to make today's post about pumpkin pie. I love pumpkin pie, yet only really eat it this time of year. It is also a tradition of mine, thanks to my wonderful Poppop, to have a slice of pumpkin pie for breakfast the following day. This year, my parents, as they have done in past years, came to visit for an early Thanksgiving celebration. I made the usual...turkey, stuffing, corn, mashed potatoes and pie. But this year my oldest declared the pie I had made boring. She thought it needed decorating, so I obliged. I pulled out my stash of marshmallow fondant and my fall cookie cutters and away we went.

I cut out some little acorns and started painting them with some food coloring.
I liked how the brown and green looked here.
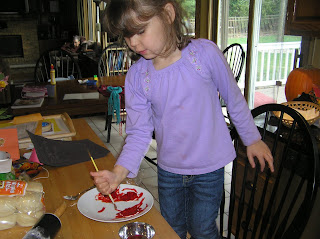
My oldest, Samantha, was in charged of painting the leaves. I gave her some red, orange and yellow food coloring to play with. She quite enjoyed herself.

I arranged our creations on the pie, and voila...

a non boring pumpkin pie. Now as for the recipe, I have to admit I used Pillsbury pre-made pie crust and followed the recipe on the back of the can of pumpkin puree. It tasted great if I do say so myself.
I wish you all a Happy Holiday filled with loved ones and yummy pie! Happy Thanksgiving.


Tuesday, November 9, 2010

Something Old, Something New

I know by the title, you would assume that this was a post about a wedding cake. Well, it is not. The old is me covering a cake in fondant. I haven't done it in awhile, and when I have, I haven't always been thrilled about the results. So I figured I would practice and show you how to cover a round cake.

First you want to have a cake with a beveled edge. Hopefully you can see it in the picture here. Then give the cake a crumb icing. By this I mean, just a thin coat of buttercream, frosting or jam is good. You don't need to make it perfect because it's going to be covered in fondant. Refrigerate your cake for about an hour.
Dust your rolling surface with some cornstrach and roll out your fondant to about 1/4 inch. I always tend to roll mine out to thin. It's something I need to practice.

To easily transfer your fondant to your cake, fold it in half and then lay it on to you cake.

Then unfold the fondant to cover the rest of you cake.

Trim your edge and use your hand to smooth out the top and sides of your cake.
Now for the new. I have been seeing these beautiful cakes where the person has hand painted them. I must say, these people are truly artist and the things they create are amazing. Since I was happy with my covering of the cake, I decided to try my hand at some painting.

I started off easy by painting some leaves. I figured my children can draw leaves, so I should be able to paint them on a cake. First I put a base coat of yellow down to get the shape of the leaf.

Then I added some red highlights to create a contrast for my leaves.

And then I finished with some brown and a very fine paint brush to add the final details of the leaves.

And while I had the brush out, I painted the birthday wish on the top. This cake was to celebrate my wonderful father -in- law's 65th birthday!

Wednesday, October 27, 2010

BOO...I've Got my Eye on You

With the start of October comes a month long making of Halloween themed goodies. I started the monthy making some cake pops for my friend Stephanie for our Bunco night. Then I made an order for a friend Heidi, for her Halloween party. And to finish up the Halloween cake pops, I made some for my daughters to take to school and pass out to all their classmates and teachers.


Cake pops ready for Bunco and a Halloween party. When making the cake pops for Bunco, I wanted to make mostly chocolate covered ones because I know people prefer them over the white chocolate ones. However, I just could not resist making the eyeball ones, it is the month of Halloween after all.
My oldest daughter Samantha took these for her 4K school party. I made them out of Pink Lemonade cake, white chocolate coating and them some marshmellow fondant to complete the look.

For my daughter Mackenzie's school party, I made some ghost for the kids. I used vanilla cake and then mixed it with some green and purple buttercreams. The result was a kind of spooky purplely gray cake inside. I thought it went well with the whole ghost theme.

Tuesday, October 19, 2010

Pretty Pretty Princess

I know I had a small hiatus there, sorry about that. I didn't have any cake orders and then I had one for last weekend, but since I don't like to show the cake before the people whom order it get to see it, I had nothing to post. Anyhoo, the order I had for the past weekend was for Gabby, who was turning four. Her mom, Jess, asked for a princess cake and sent over a picture of a beautiful cake that Gabby herself picked out. With a few adjustments, Jess and I came up with what you will see below.

The original cake was a three tiered cake, but Jess didn't need quite that much cake. The cake is a marble cake with two layers of a wonderful raspberry filling and one layer of chocolate.
The princess crown was made with marshmellow fondant and then brushed with pearl disco dust to add some shimmer.

I loved how bright the colors of the cake were. Happy fourth birthday Gabby!

Tuesday, September 28, 2010

All a Flutter

One of the moms from my playgroup asked if I could make the cake for her daughter's birthday. Wendy said she would like something with butterflies. She also stated that she was planning on using blues, purples and greens, and nothing pastel.

The cake was a white cake with two layers filled with lemon curd and the third layer filled with a strawberry filling. I was going for a strawberry lemonade flavor combination.

I thought it would be fun to have the butterflies flying up the side of the cake. The flower's petals were actually made from the large butterfly wings that I had made to put on the cake, but decided not to use.

All the butterflies were hand painted. I figured by hand painting them, I would keep the color bright and vibrant. This was a fun cake to create and I really like how the butterflies turned out.

Wednesday, September 22, 2010

Chugging Along and Constructing Some Cakes

My friends Aimee and Laura had a joint party for their boys, who just happen to be the best of friends. Their cakes were a lot of fun to create, incorporating the likes of each boy. I wanted each cake to be different but coordinate with one another so they looked good together at the party.

Josh loves diggers, so Aimee gave me a bunch of toy diggers to use on his cake.

We went with a construction theme for Josh's cake, which was chocolate with a chocolate filling. I loved the way the rocks, made from marshmallow fondant, turned out.

For Noah's cake, which was vanilla cake with vanilla filling, we went with a train theme.

Laura gave me this great little train set to use on Noah's cake. I had fun making the train seem to go through the cake. I also like how the trees give some added color to the whole cake.

The boys both loved their cakes, which made me very happy to hear. This was a different way of doing cakes for me. It's not too often I get to use toys to decorate cakes. I liked how each cake got to represent the little boy it was created for. Happy belated Birthday Noah and Happy Early Birthday Josh.