First you will need at least three layers of cake for each tier. I myself used four. Slice one layer on an angle like pictured above.
Now flip the one piece upside down onto the other piece.
Layer your cake like you normally would, making your angled layer the top.
Do a crumb coating (or a thin layer of frosting) on your cake. Refrigerate to set the buttercream.
Cut a piece of wax paper in a circle the same size as your next tier. Place it on the cake and cut out the shape with a sharp knife.
Score the circle into four sections to make it easier to remove the cake.
Now simply remove the sections, creating a crater for the next tier to sit in.
Frost your cake again, then refrigerate it to prepare for your fondant.
Cover your tier in fondant, making sure to smooth the fondant into the crater. Also, as for all tiered cakes, you need to place dowels or cut straws to help support the weight. Follow these steps for all you tiers, except of course your top layer. When placing the next tier on, put a little buttercream in the crater to help adhere the cake. Also you will want to put the slant of the next tier the opposite direction as the layer below it.
Follow the steps above, decorate as you see fit, and you will have a final product like what you see above. This year, my daughter had a rollerskating party and our theme was Rock and Rollerskating.
Samantha informed me that the cake needed a pair of roller skates on it because of the theme. So here's my cake topper.
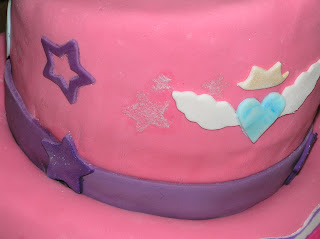
I hand cut a guitar and peace signs, and used cookie cutters for my stars, flowers and heart with wings. All these items were on the napkins and plates we had for the party, so it was only fitting they make it on the cake.
I originally wanted to have swirls airbrushed on the fondant like a background for the other decorations. Sadly, I do not own a airbrush (yet) and the can of spray food coloring didn't give me enough control or a fine enough line to get the look I wanted. Instead I used a stencil and some pearl disco dust to create a background of stars.


Another adorable cake. I'm sure that it was the hit of the party.
ReplyDeleteLove Aunt Cathy